Controlling lights with Strudel
Strudel is made for making music, but it’s possible to pattern other things with it, including lights.
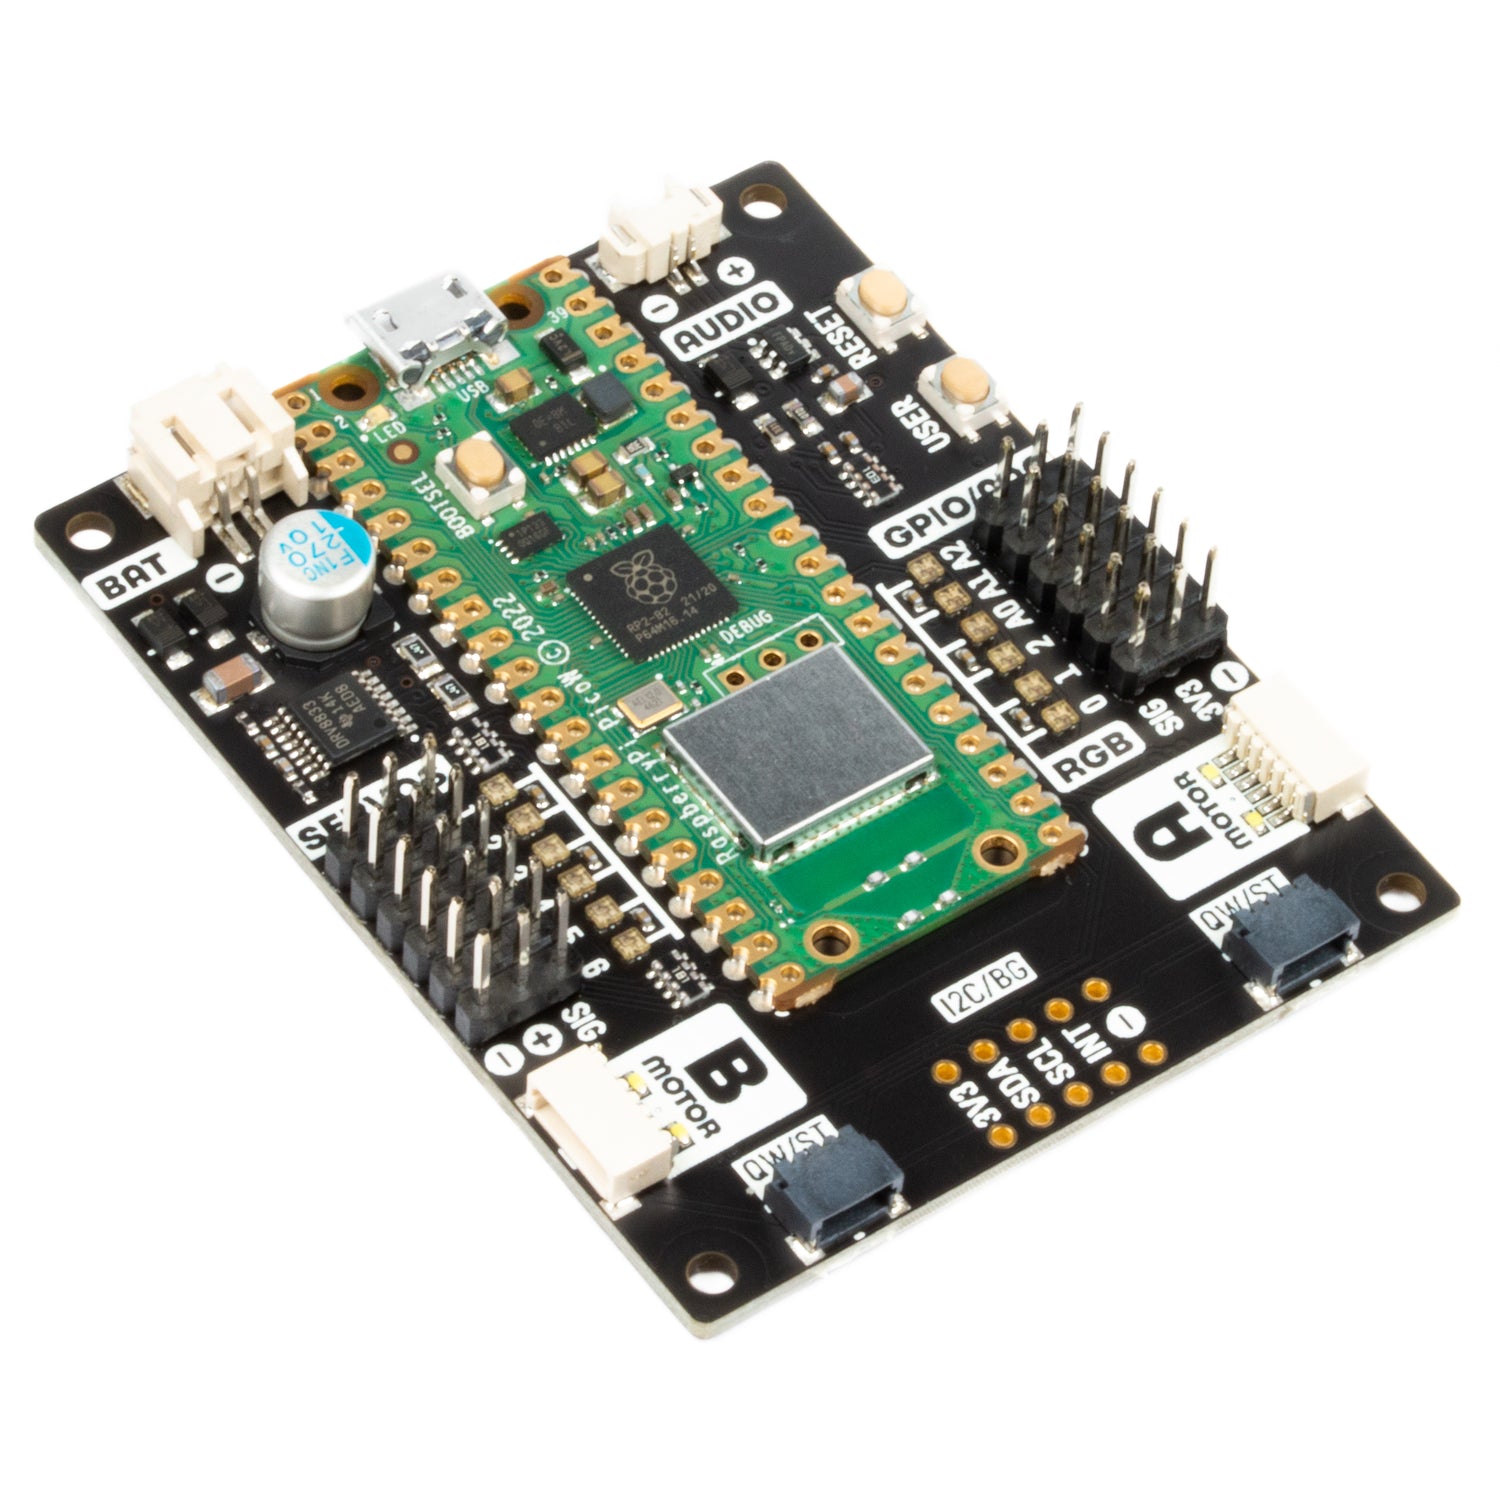
We’re going to use a microcontroller for this, called an “Inventor 2040W”, which is a Pico W. It’s mainly designed for controlling motors, but here we’ll use it to control lights.
Technical details
Feel free to gloss over these!
- The Inventor 2040W connects to the internet wirelessly. It’s powered via USB but you don’t have to plug it into a laptop, and you can even power it from a battery.
- It’s running some code that listens for messages using an “Internet of Things” network protocol (called MQTT). When it receives a message, it flashes a light.
- It connects to a small server (running software called ‘mosquitto’) in our studio. You can also configure it to connect to another server if you want to use it outside out the studio - it’s a bit fiddly, but I can show you how.
- Strudel can send these messages instead of triggering sounds - that’s how we use it to pattern movement!
The art of light play
There is a long history of people experimenting with light patterns, with quite a few indendently inventing the light organ. For example from 1906, Mary Hallock-Greenewalt invented her ‘sarabet’ light instrument.
She published an fascinating book reflecting on this called ‘Nourathar’, here’s a blog post I (Alex) wrote with some choice quotes.
First light
Let’s get a light flashing!
-
Note the letter drawn on a label on the back of the microcontroller.
-
Plug your microcontroller into USB power
-
Plug your light strip into ‘servo’ plug numbered 6, with the dotted (lightest) cable closest to the 6.
-
Run the below to set up some values, changing the
xinlight:xto the letter on your microcontroller. Nothing will happen yet!
// Change this to match the letter on your device !
const name = "light:x"

// Code to set up extra commands including a 'send' command to
// send patterns to your microcontrollers
const {hue, saturation, brightness, light, topic, blink}
= createParams('hue', 'saturation', 'brightness', 'light','topic','blink');
window.light = light; window.hue = hue; window.saturation = saturation; window.brightness = brightness; window.topic = topic; window.blink = blink;
Pattern.prototype.lights = function() {return this.topic(name).mqtt('alpaca', undefined, undefined, 'wss://things.patternclub.org:443/mqtt')};

silence
If you refresh the page, you’ll need to change and run the above again before the following patterns work.
If your lights starts flashing unexpectedly, someone else might have put your letter in the light:x line by mistake!!
If things stop working, try pressing the reset button on the microcontroller.
- Now, run the below. It will ask for a password, which is set to be the same as the alpacalab wifi password. Hopefully your lights will then start to flash!
color("red [yellow green] tomato pink")
.light("0 1 4 30")
.blink(true)
.lights()
Using the main strudel interface
If you want to work in the main strudel ‘repl’, click here for a starting point with the set-up code and light code together.
Light rhythms
If you put the ‘light’ command first in the pattern, that’s where the ‘rhythm’ will come from:
light("0 1 2 40 15 [20 5] 30 [0 0 2, 3]")
.color("red blue")
.blink(true)
.lights()
Remember that you have to have a . between commands, so if you swap the light and color commands you have to keep the . between them:
color("red blue")
.light("0 1 2 40 15 [20 5] 30 [0 0 2, 3]")
.blink(true)
.lights()
Change ‘blink’ to ‘false’ to keep lights on until the next colour change, for example in this pattern:
light("0 1 6 3")
.color("<green blue>")
.blink(true)
.lights()
Colour names
There are a lot of standard color names available.
Note that the color names have to be all lowercase.
Colours by number
You can also specify colour with up to three numbers, from 0 to 1:
- ‘hue’ - position around the color wheel between 0 and 1
- ‘saturation’ - from greyscale (0) to full colour (1) (optional)
- ‘brightness’ - from light off (0) to full brightness (1) (optional)
‘Brightness’ is sometimes referred to as ‘value’. For more information you could have a look at the wikipedia page for hue, saturation and value.
hue("0 0.1(3,8)")
.saturation("1").brightness("1")
.light("1")
.blink(true)
.lights()
We can then use e.g. the ‘saw’ signal to move around the colour wheel smoothly:
hue(saw).saturation("1").brightness("1")
.light("0")
.blink(false)
// saw is a continuous signal, we need this 'segment' to take values from it
.segment(32)
.lights()
Random colours
Here ‘hue’ is set to a random colour. Change rand to perlin for a smoothly changing randomness.
light("0 .. 49".slow(4))
.hue(rand)
.saturation("1").brightness("1")
.blink(true)
.lights()
Fading lights
Here’s a trick to get lights to fade in and out.
light("0 1 [2 3] 4 5")
.hue("0 0.25 0.5 0.75")
.squeeze(brightness(fastcat(saw,isaw).segment(16)))
.saturation("1")
.blink(true)
.lights()
All the lights
If you set light to -1, they will all come on at once.
light("-1 [1 2 3]")
.blink(1)
.color("purple blue")
.lights()
The above are some examples, but there’s a lot more possible than I’ve thought about. If you have an idea and are unsure how to code it, please ask !